Create a React App under 1 minute

I'm a software developer with a love for problem-solving and creating intuitive user experiences. I specialize in JavaScript, TypeScript, Python, and React.
On this blog, I share tutorials, coding tips, and lessons learned from my journey in tech. My goal is to make complex concepts accessible to everyone.
If you're new to React and have been wondering how to get started, this tutorial is for you. We'll be showing you how to create a React app in just a couple of minutes using a handy tool called "create-react-app." By the end of this guide, you'll have a basic React app up and running, and you'll have a better understanding of the key concepts and components that make up a React app. Let's dive in!
Creating our Folder
To begin, navigate to the directory where you want to create your React app and create a new folder. You can name the folder whatever you like.

Right-click and select open with visual studio code

Opening a new terminal
Click on the "Terminal" menu located at the top of the screen
Select "New Terminal" from the drop-down menu.
This will open a new terminal window at the bottom of the screen, where you can enter commands

We will be creating our react app from the terminal
To create a new React app, use the command
npx create-react-app [app name], where [app name] is the name of your app. For example, if you want to create an app callednavbar, the command will benpx create-react-app navbar.npx create-react-app (name of your app) //npm create-react-app navbaryour terminal will look like this

And the final result after installation

After creating a new React app using the command
npx create-react-app [app_name], you will need to navigate to the new app's folder in your terminal.You can navigate to the new app's folder by running the command
cd [app_name]. For example, if you named your app "navbar", the command would becd navbar.This will change the current directory in the terminal to the new React app's folder.
Once you are inside your app folder, you can start the development server by running
npm start
The command will compile the code and launch a development server when you run it. It could take a few seconds to finish this process.
Your default browser will launch automatically after the server is running and show the app at http://localhost:3000. By manually entering this address in the browser, you can also launch the app.
You should see "Welcome to React" or something similar on the default react page. This indicates that your React application is active. From this point, you can begin developing your app and modifying the project's files. You can see the results of your work right away because the changes will be reflected in the browser in real-time.

Now that your app is running, you can begin editing it to suit your tastes.
You might want to start by changing the text that is shown on the browser. Editing the code in the "src" folder will allow you to do this.
In your project structure, you have
/publicand/srcdirectories, along with the regularnode_modules,.gitignore,README.md, andpackage.json.
In
/public, our important file is index.html. The/srcdirectory will contain all our React code.You can delete all the files out of the
/srcdirectory, and we'll create our own boilerplate. We'll just keepindex.css,index.js,app.js.Edit your index.js to look just like this.

Edit your app.js to look just like this
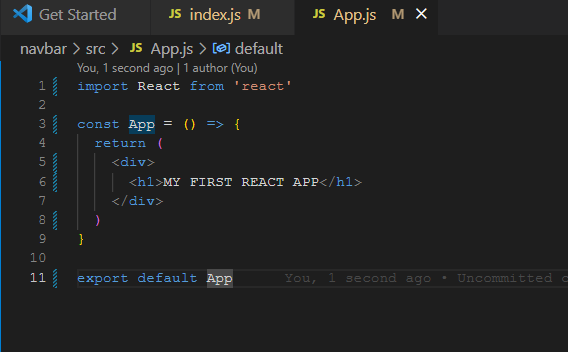
After making the required changes to your React app's code, you should be able to see the updated text "MY FIRST REACT APP" on the browser.
If you do not see the changes, try refreshing the browser page
It's important to note that any changes made to the code while the development server is active will automatically be reflected in the browser, allowing you to see the outcomes of your work in real-time.

Conclusion
After successfully developing and customizing your first React application, you can now move on to learning about additional React features and functionalities. You can find a wealth of online tools, including guides, forums, and documentation, to support you as you continue working with React.
Keep experimenting and happy coding!
I'd love to connect with you via Twitter | LinkedIn | GitHub |


